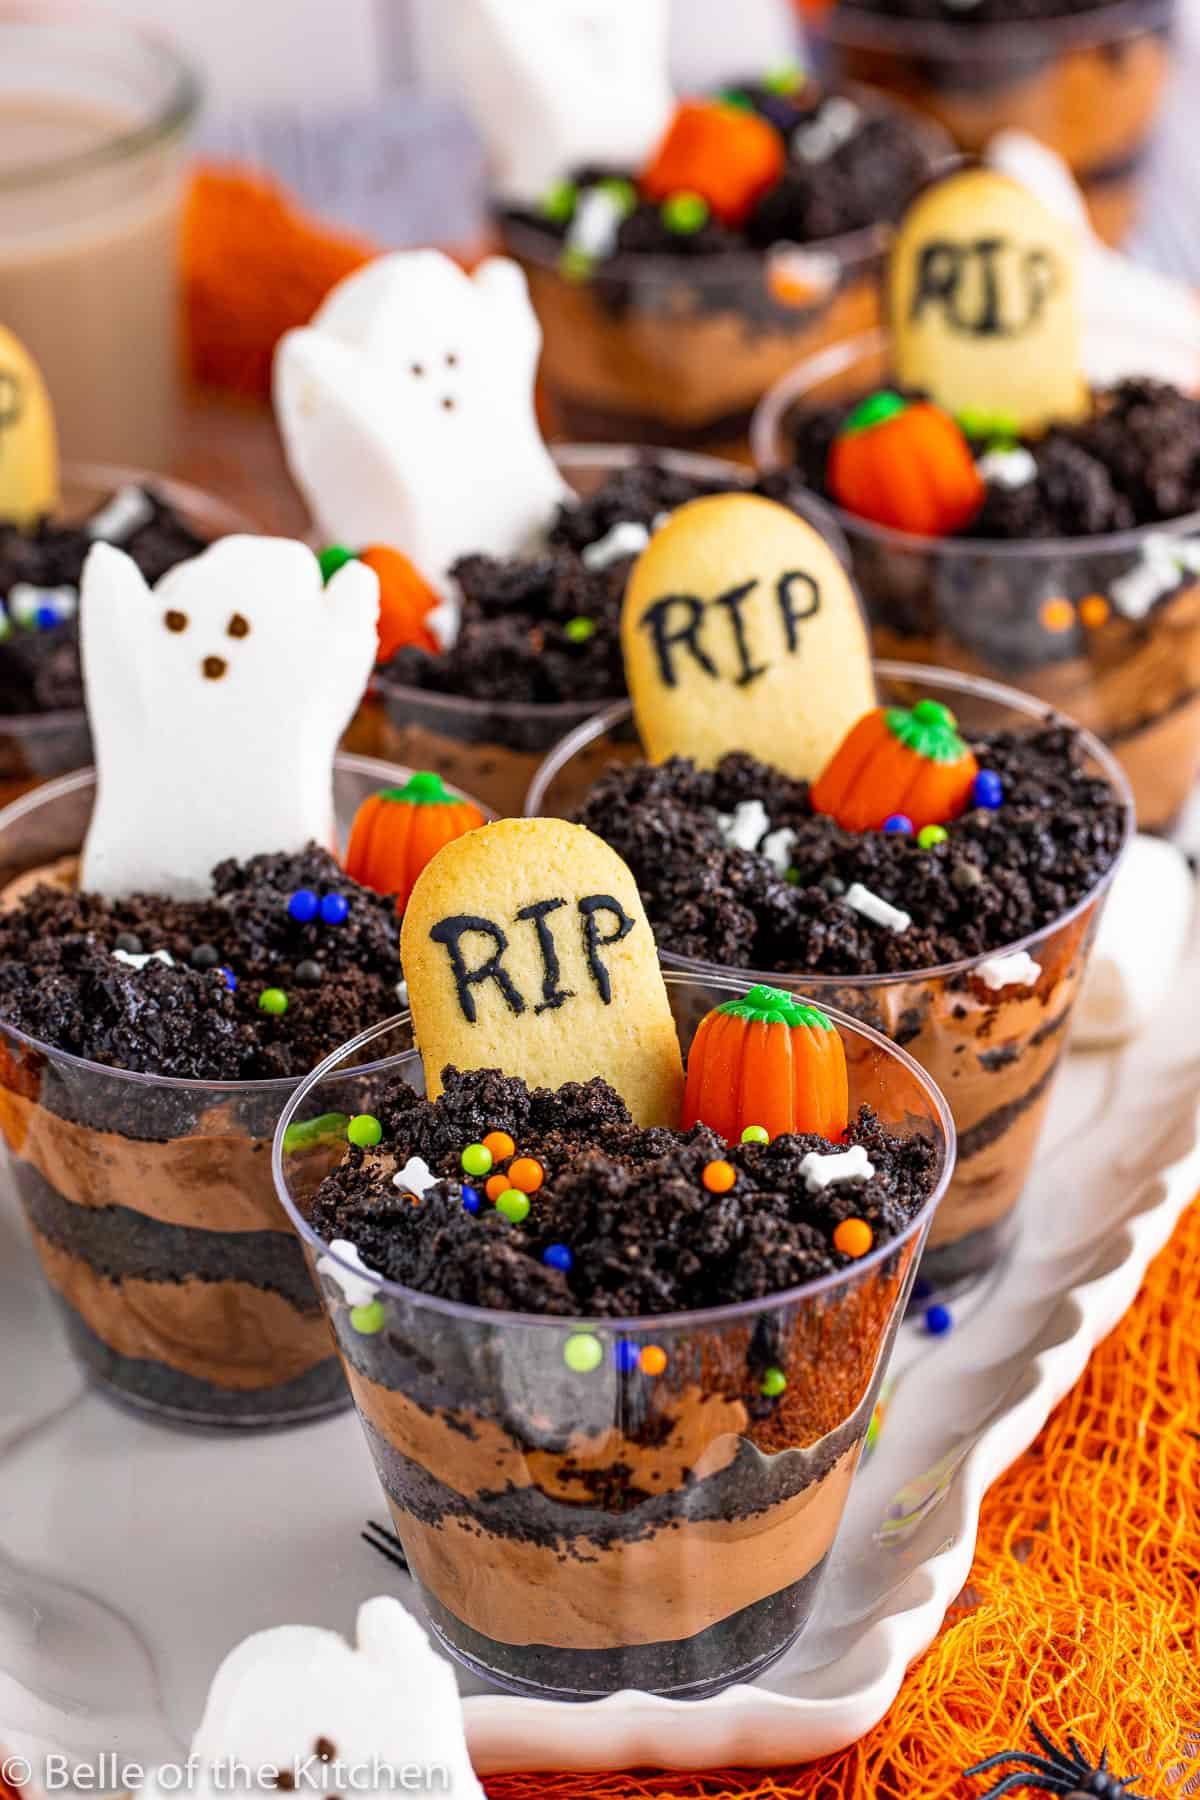
Halloween Dirt Cups
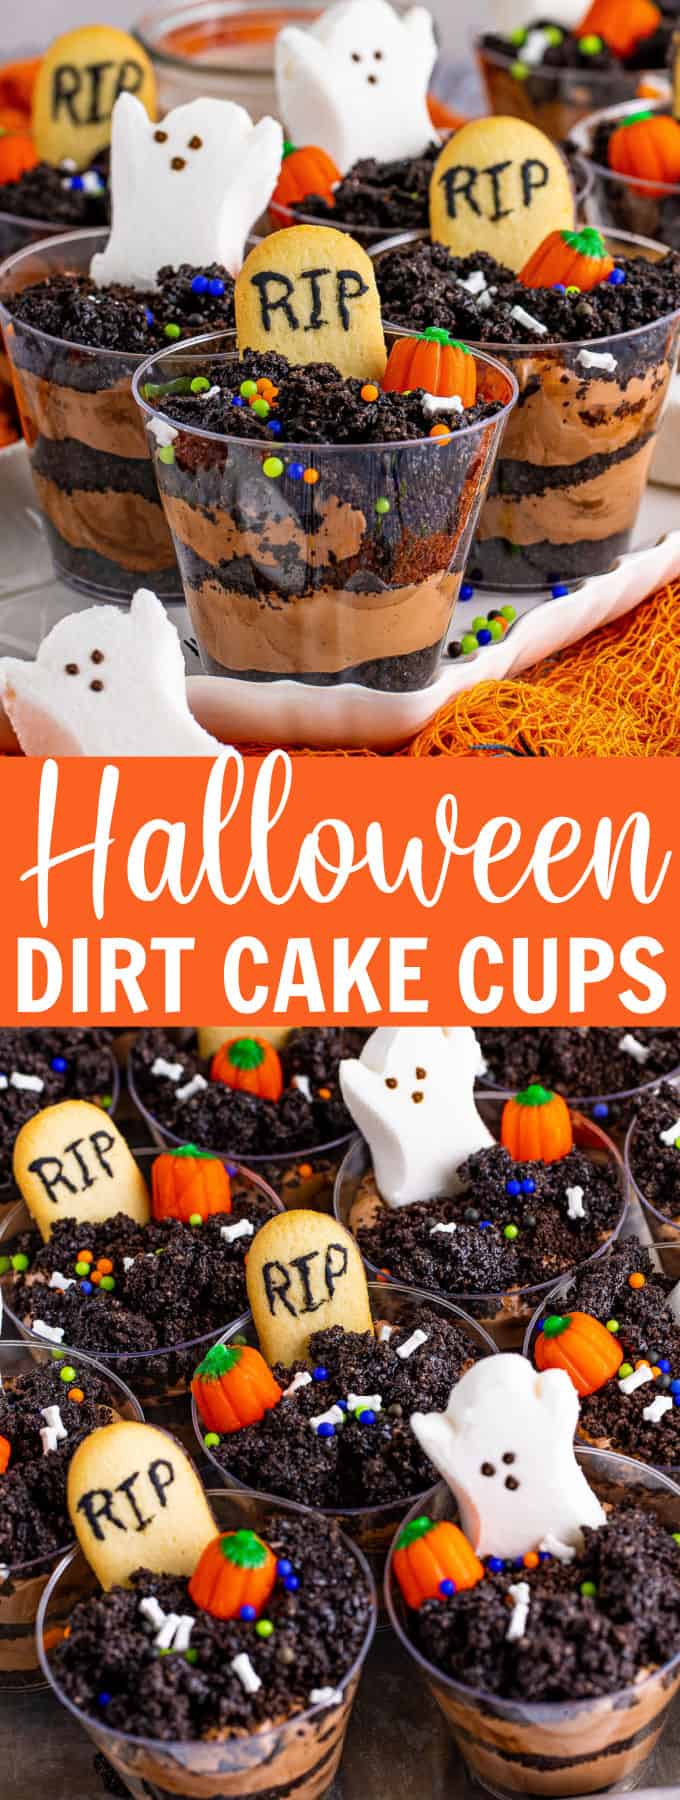
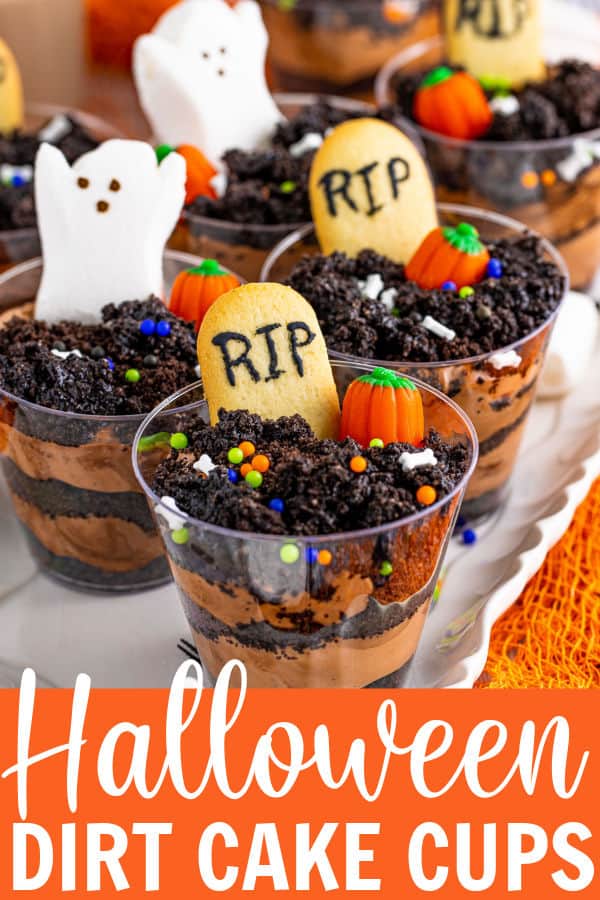
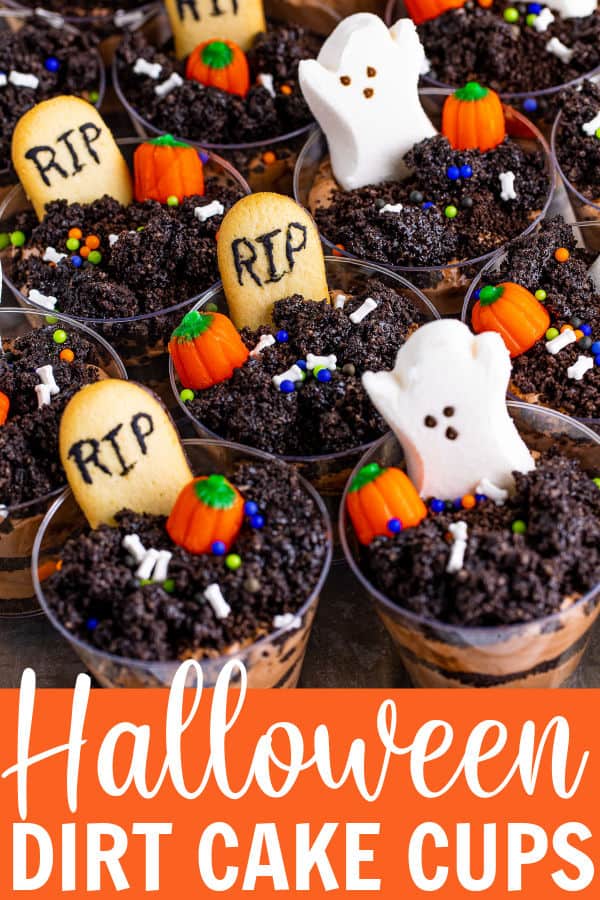
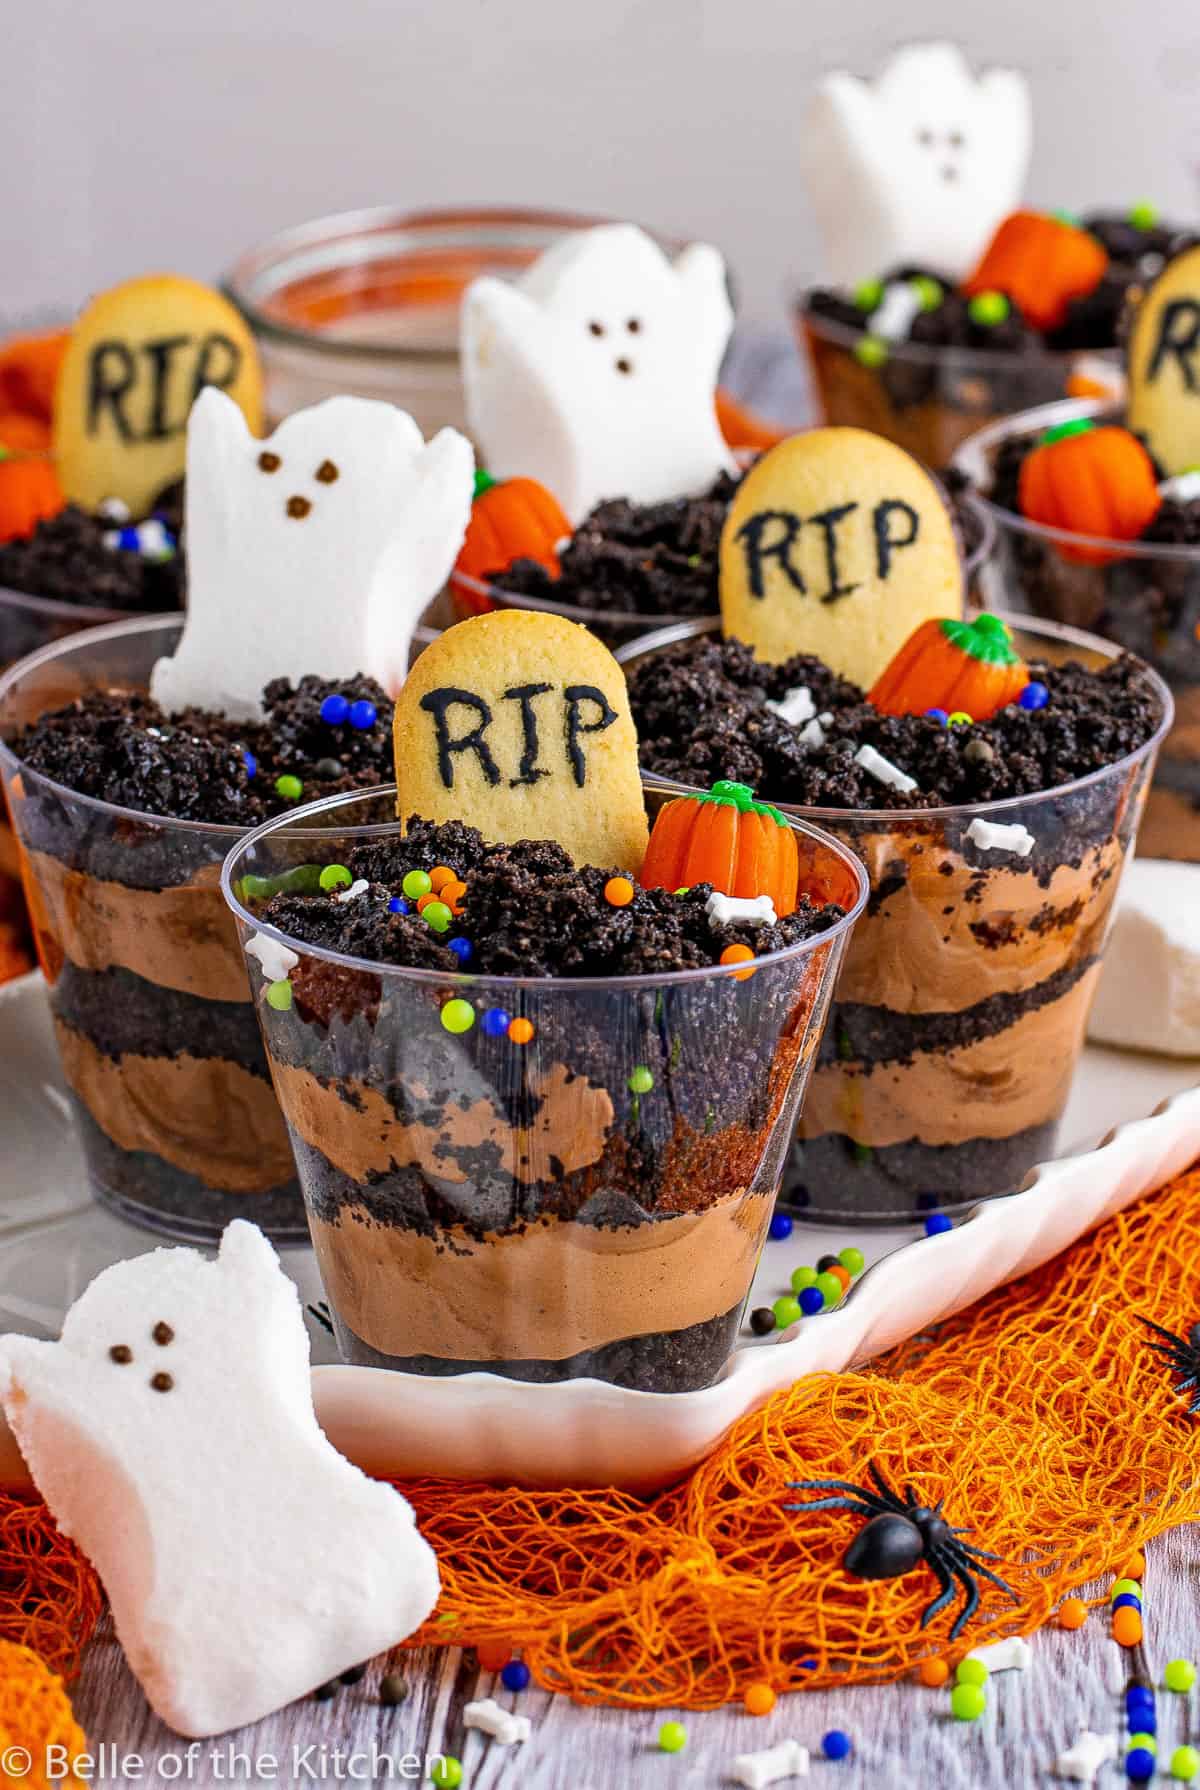
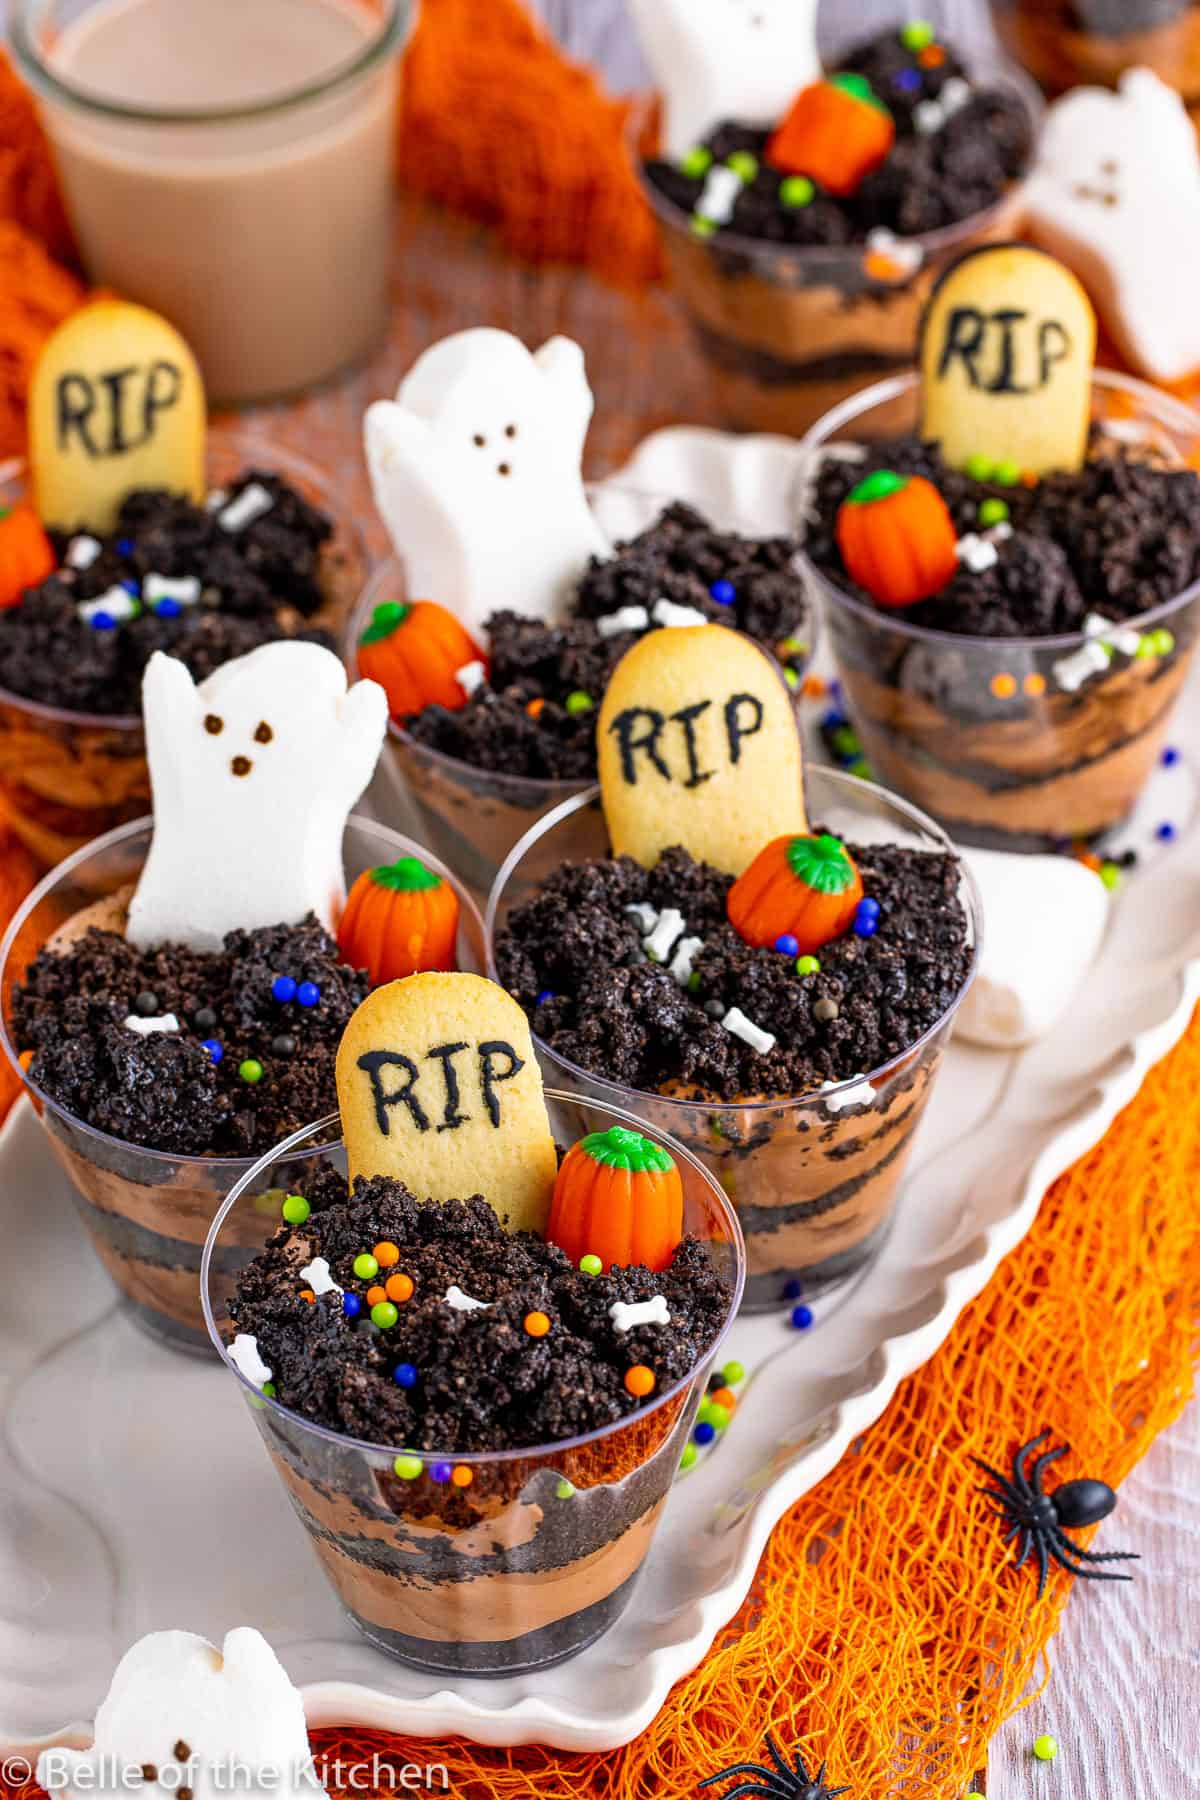
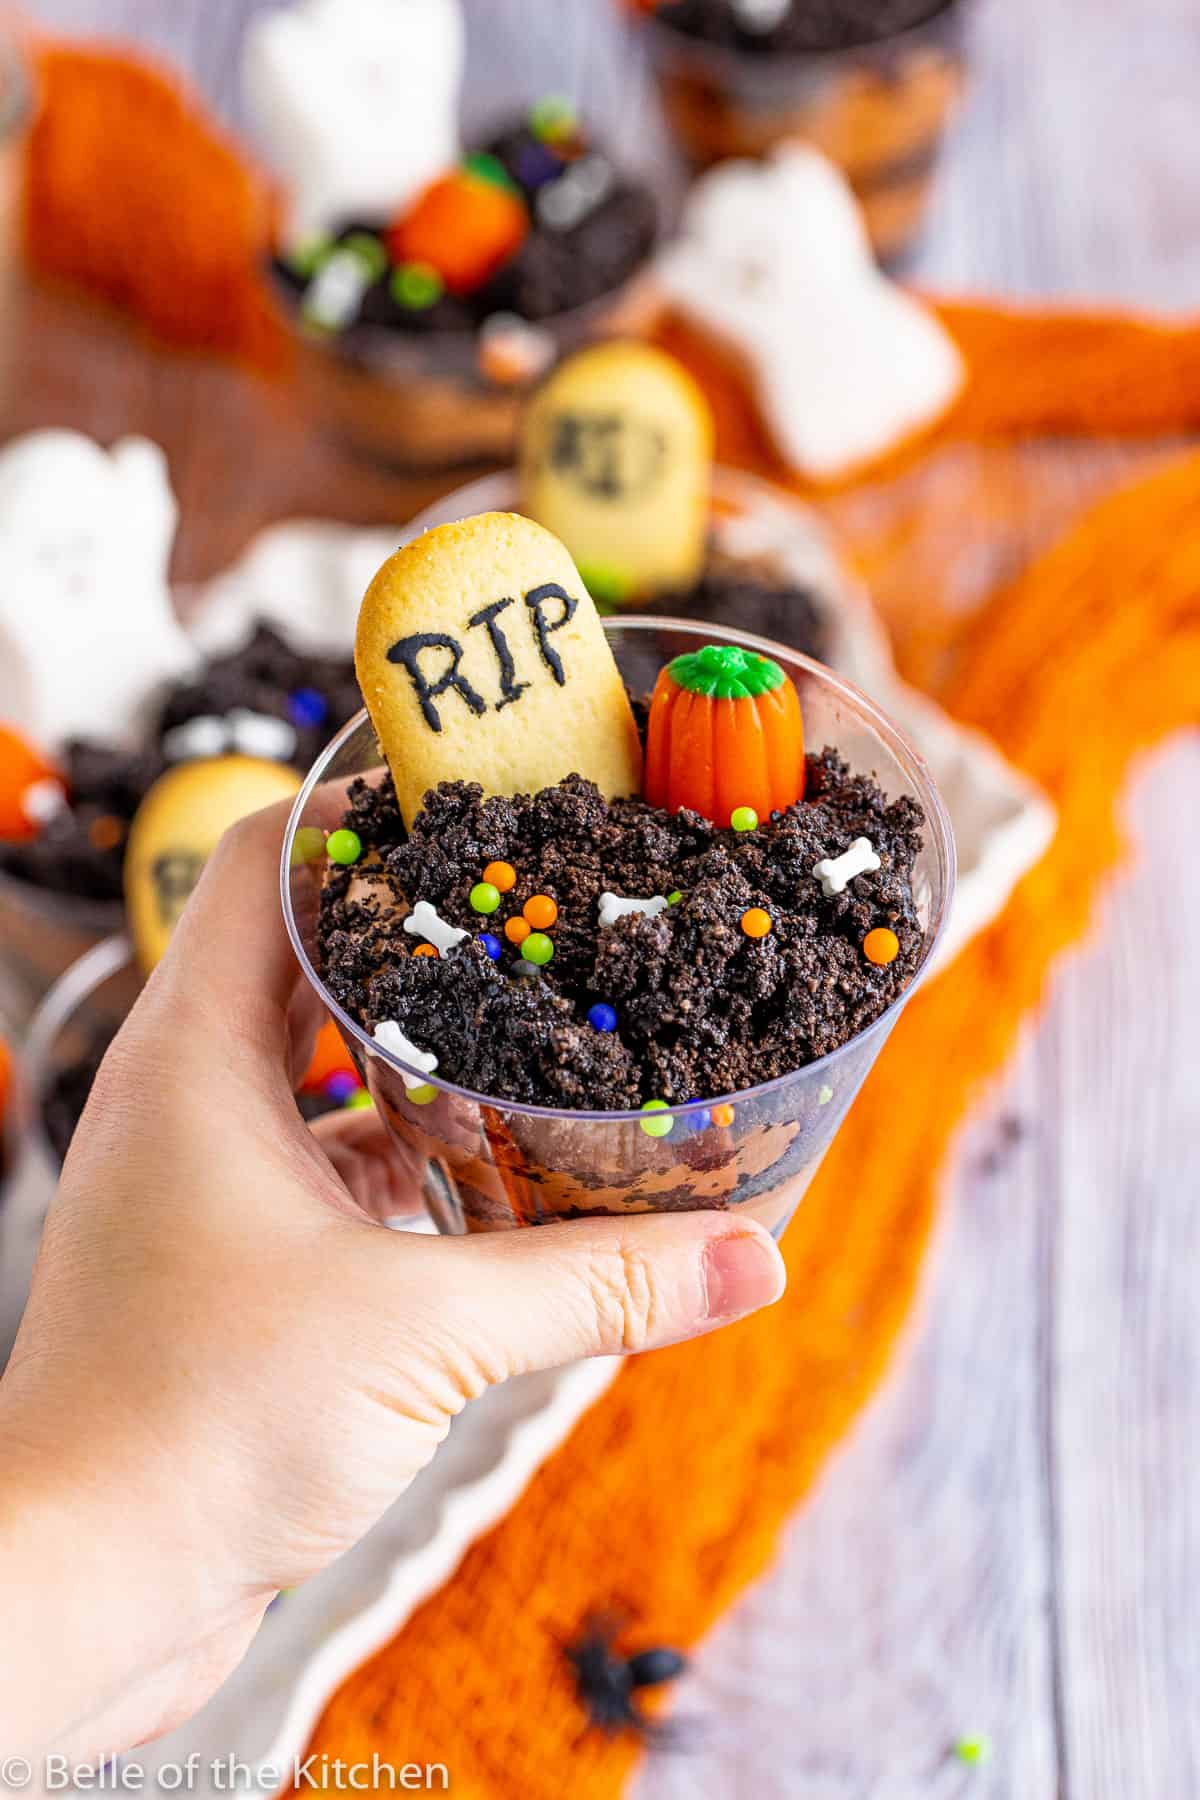
These Halloween Dirt Cups are a frightfully fun treat! Layers of rich chocolate pudding, crumbly Oreo “dirt,” and cookie headstones make these the perfect spooky dessert for your Halloween night!
For more hauntingly delicious Halloween treats, be sure to check out my Fanta Jack O’Lantern Floats, Halloween Sugar Cookies, and Candy Corn Oreo Cookie Balls.
Halloween Dirt Cups – the best Halloween dessert!
Spooky season is finally here! If you’re looking for an easy and scary-good treat, these Halloween Dirt Cups are just what you need.
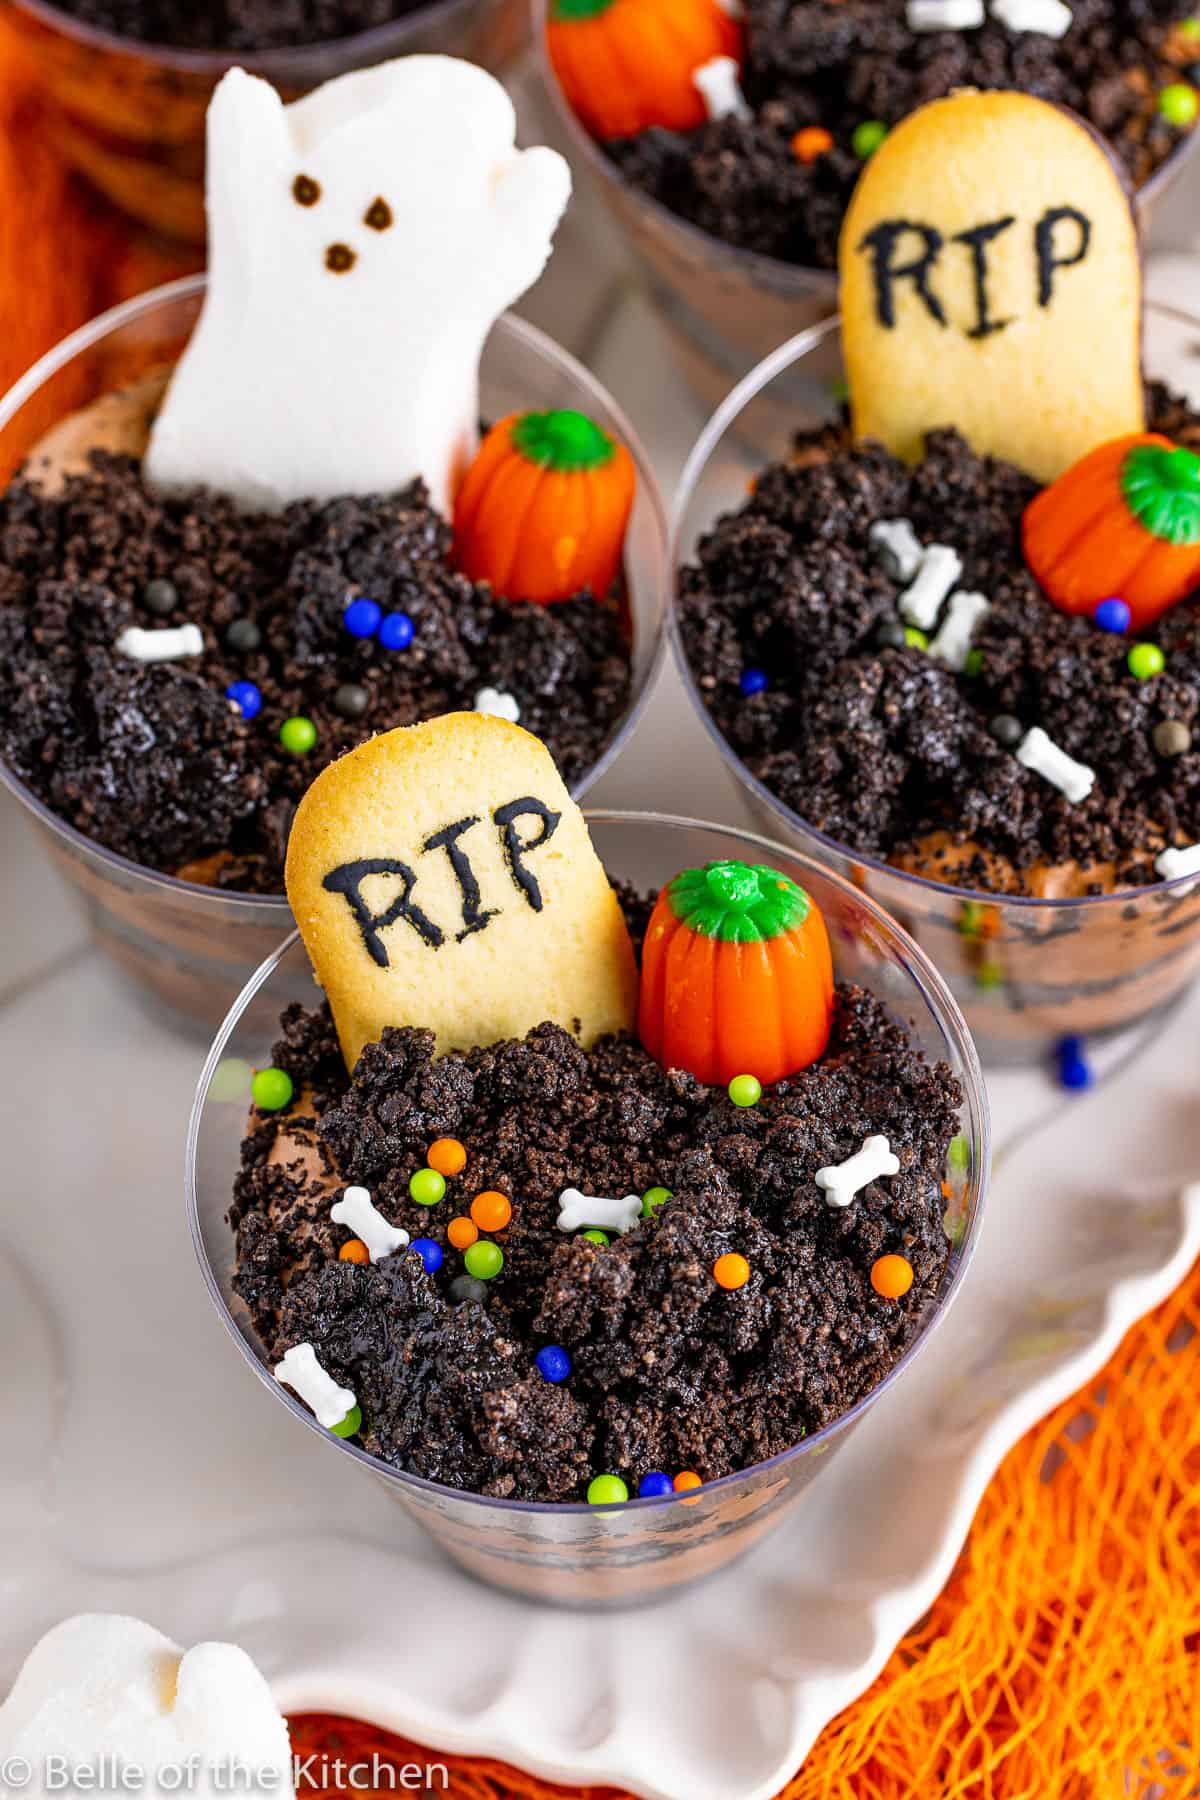
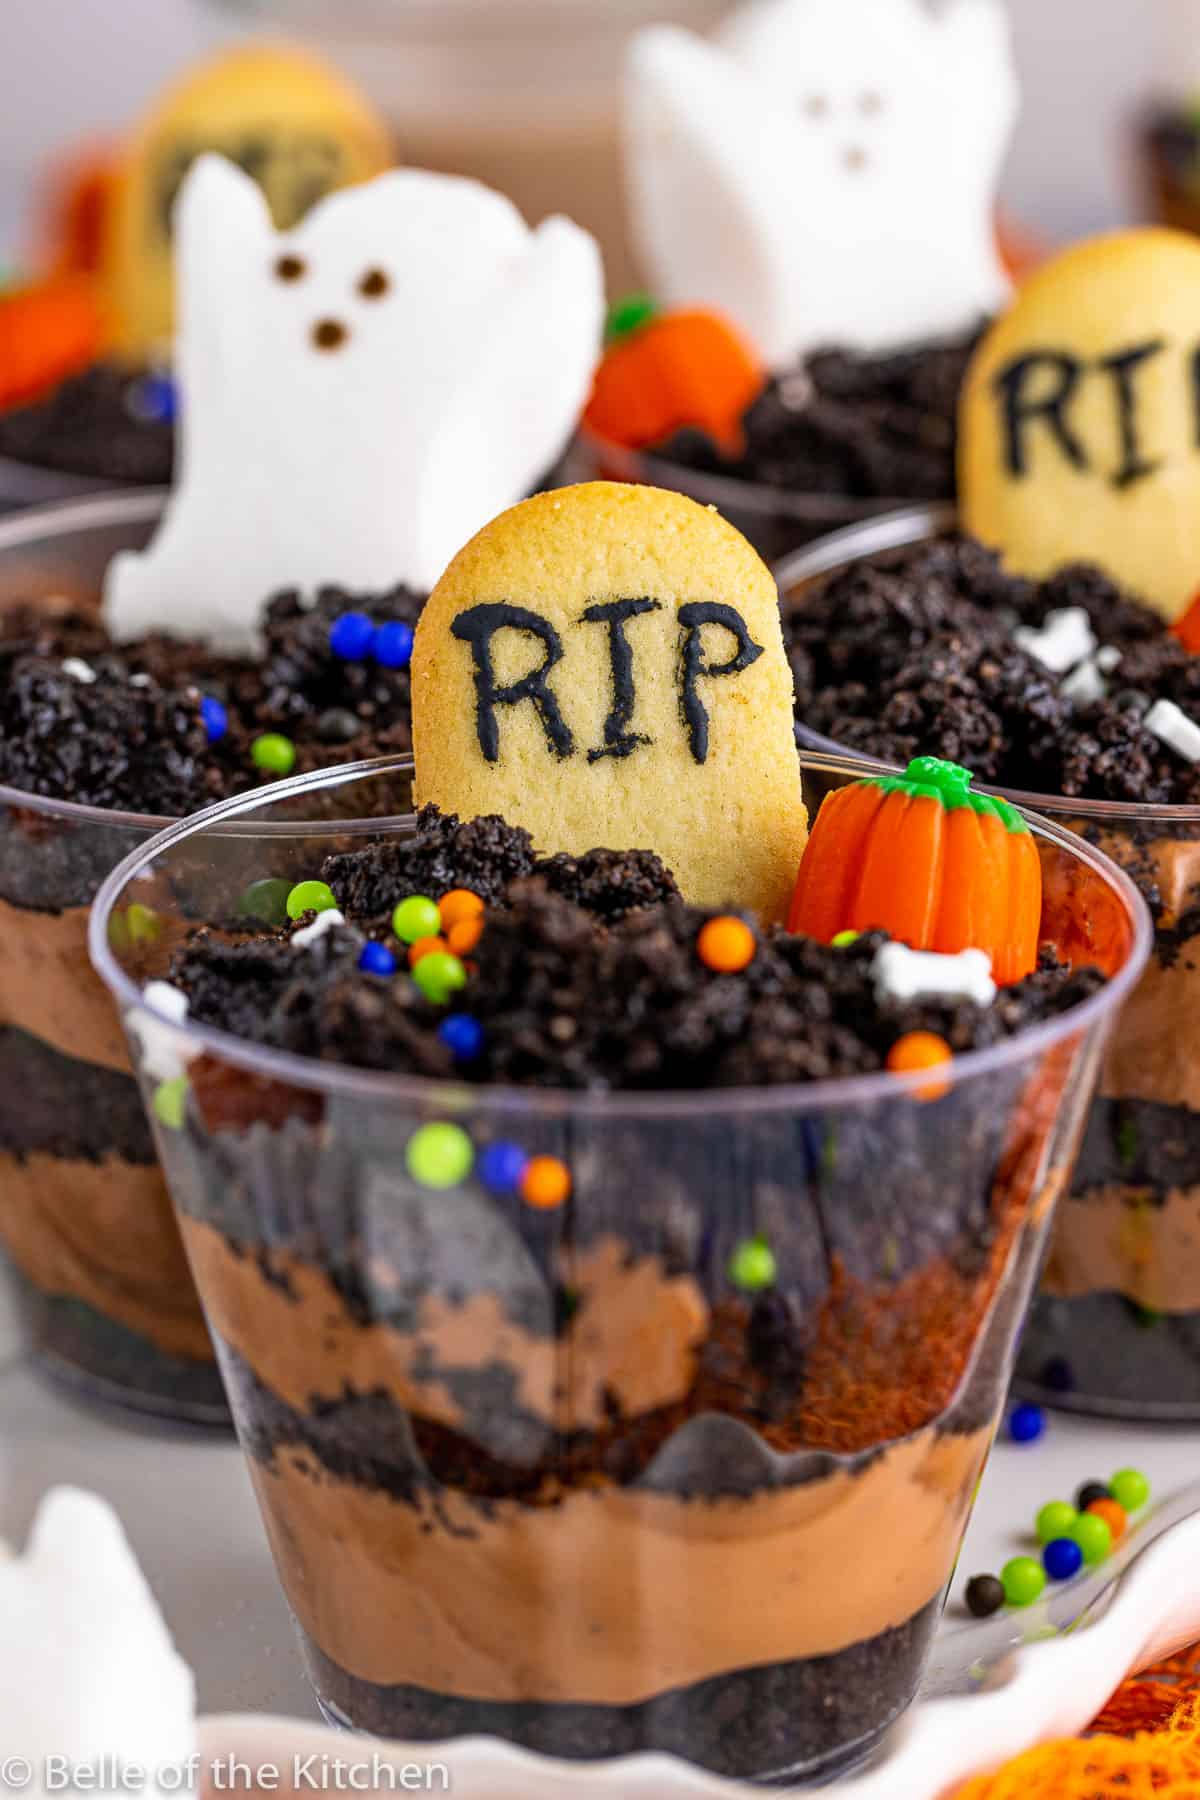
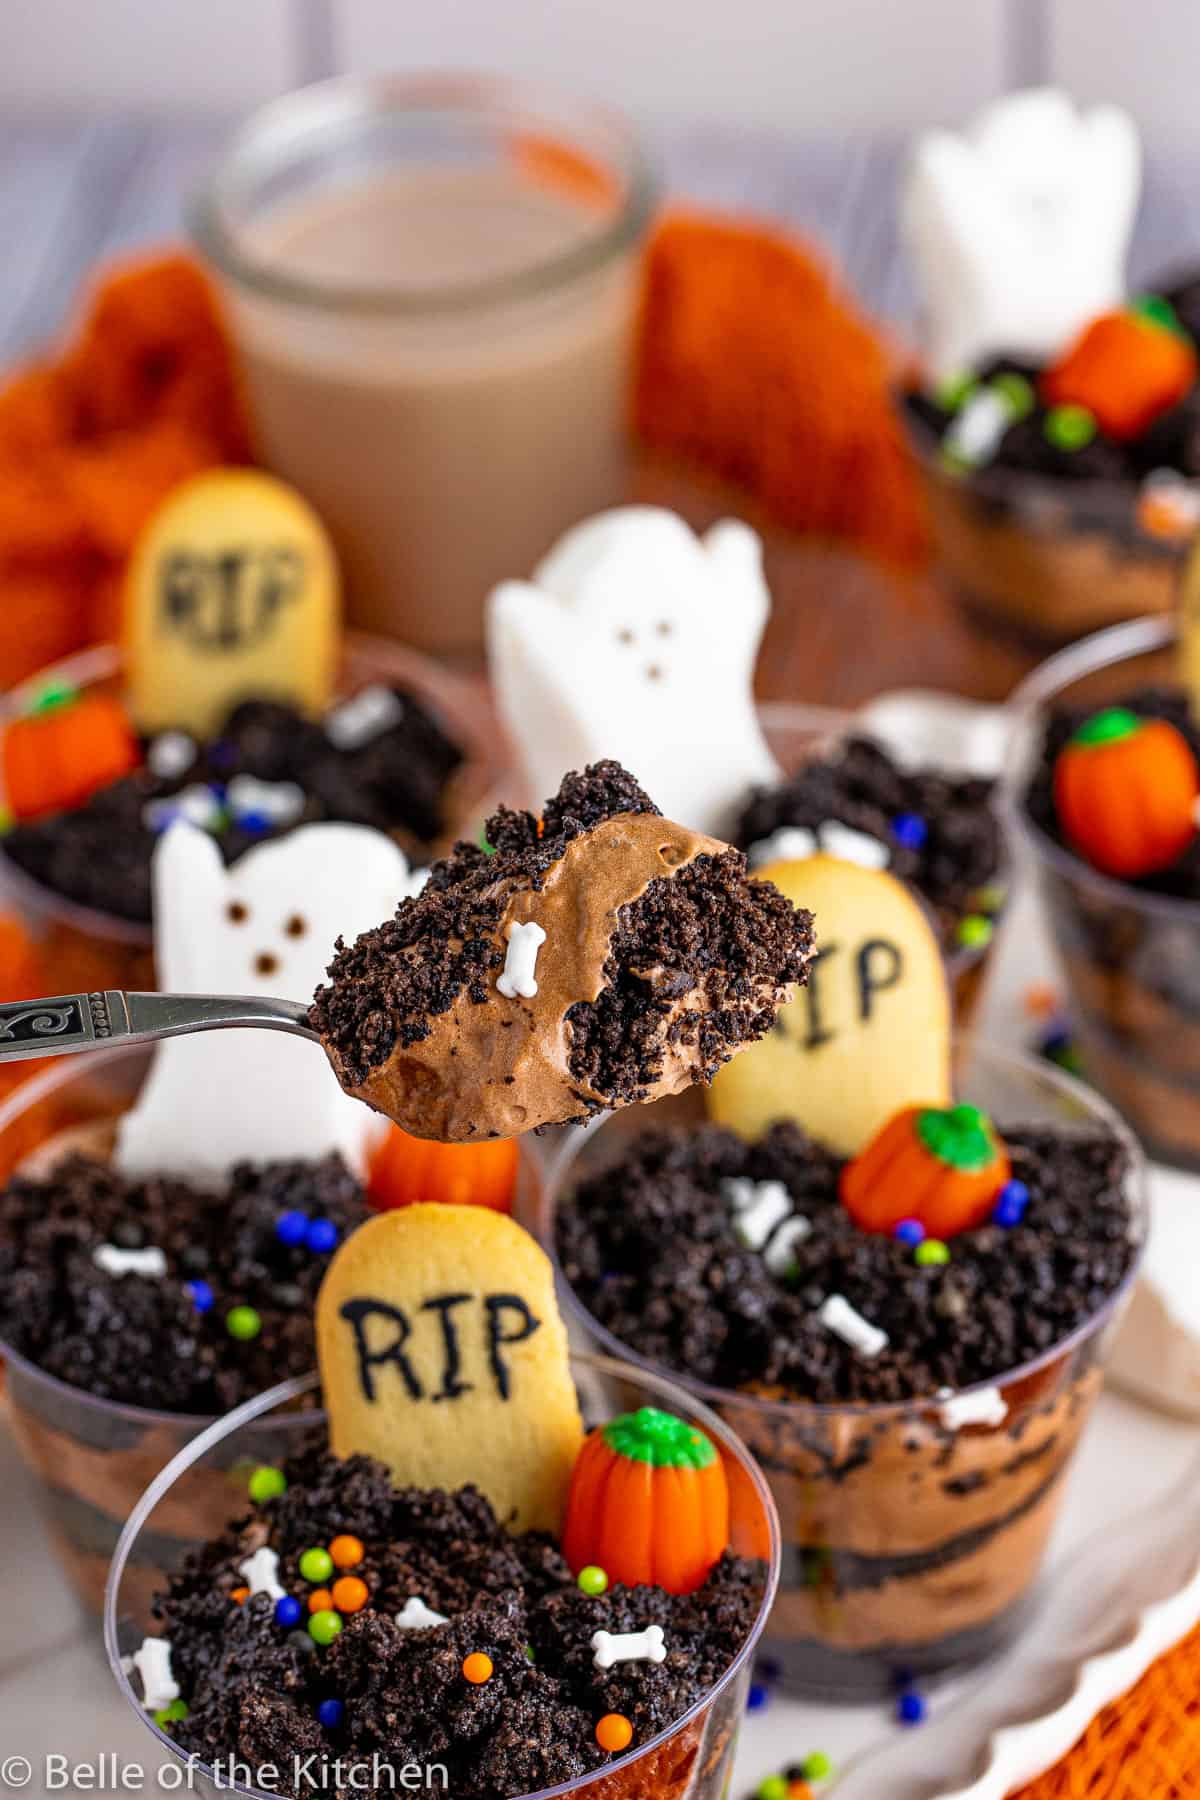
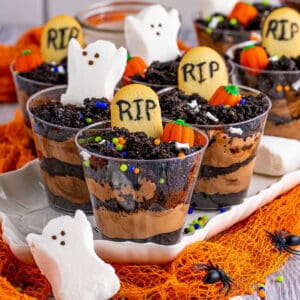
These are a lot of fun for the kids to help make, and the ingredients and prep are super easy. They are made from layers of Oreo “dirt” and chocolate pudding, then topped with cookie tombstones, Halloween candies, and spooky ghost marshmallows!
They are perfect for a party treat or for Halloween movie night! No matter what creepy event you serve them for, these Halloween Dirt Cups are sure to be a hit with all ages!
For a full day of fun Halloween food, try some Halloween Donuts or Pumpkin Pie Biscuits for breakfast. Then for dinner, fill up with a hearty bowl of Green Chile Stew and these Halloween Dirt Cups for dessert. And of course, don’t forget the candy!
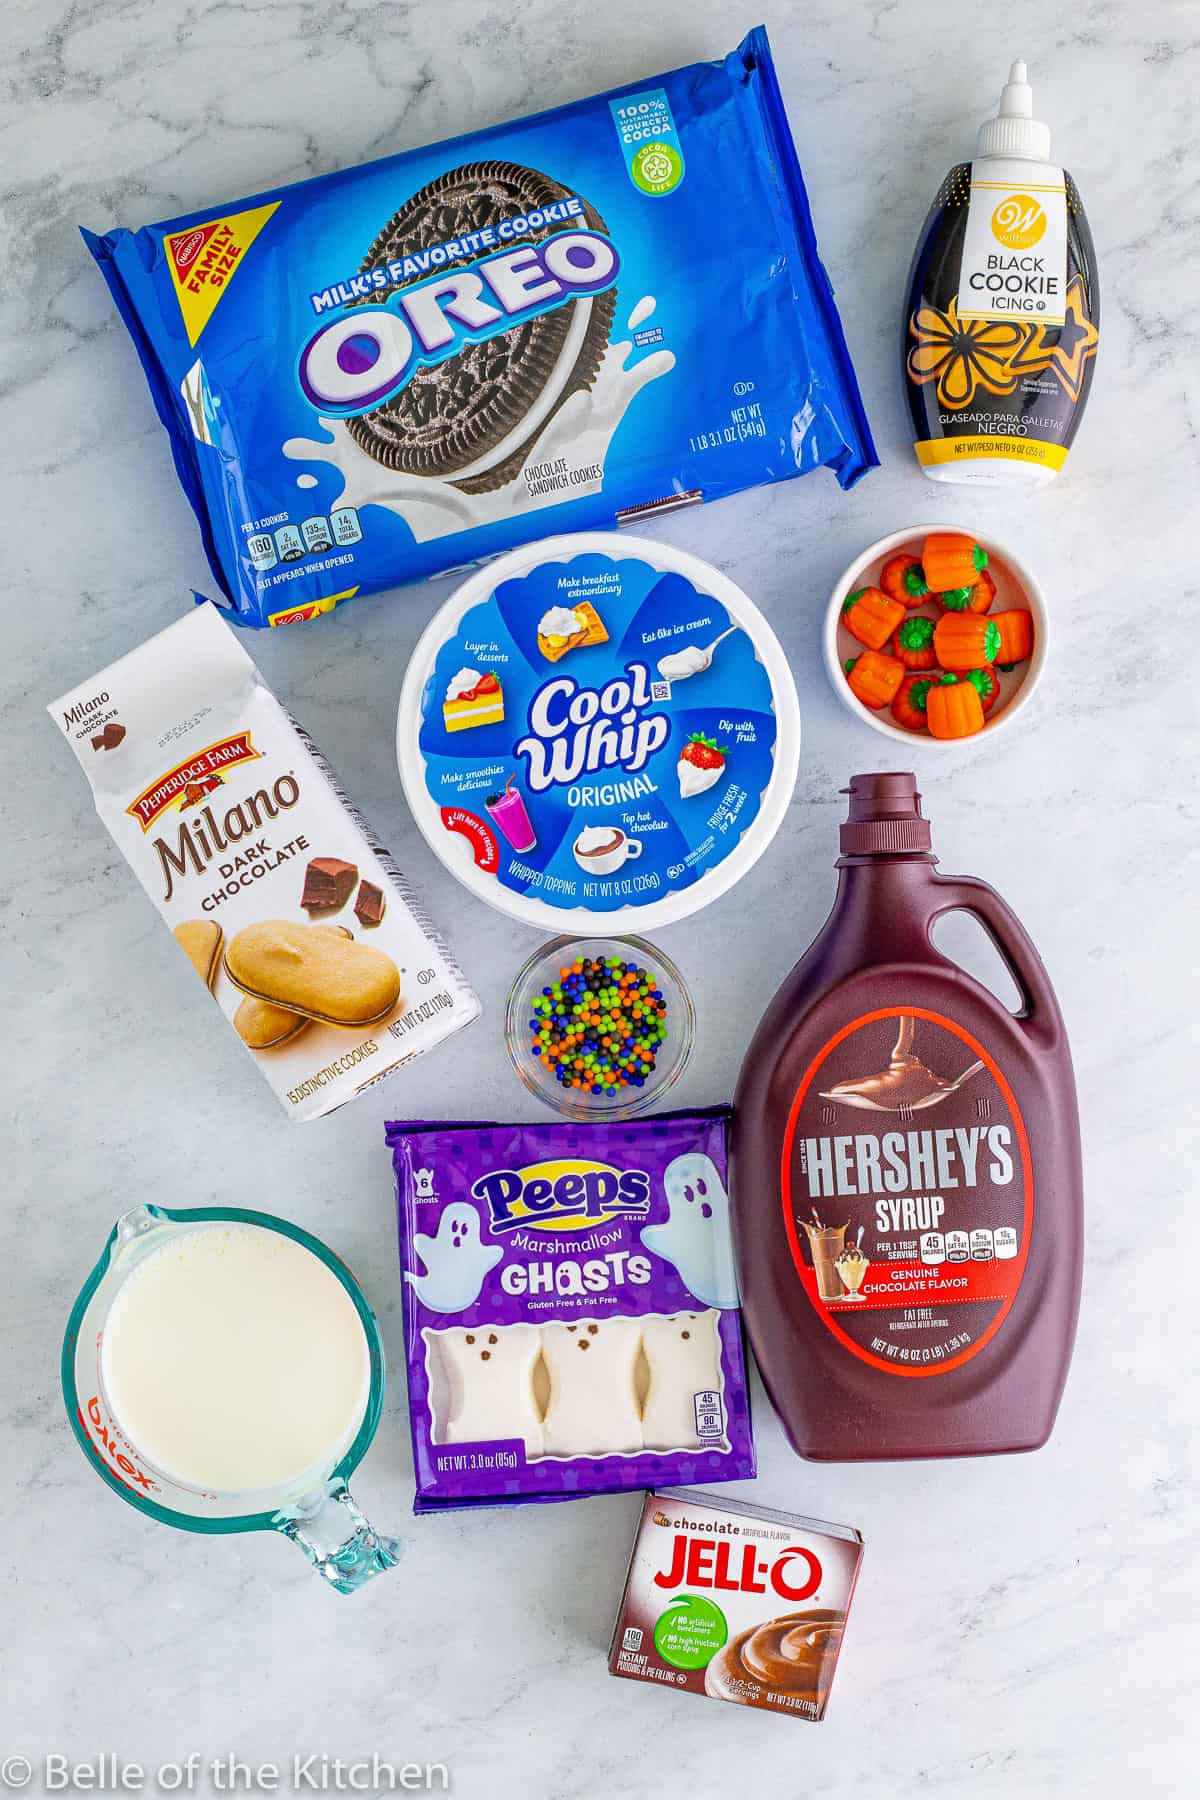
Ingredients for Halloween Dirt Cups
- Oreos
- milk
- chocolate pudding mix
- frozen whipped topping
- chocolate syrup
- Milano style cookies
- Decorations: mini pumpkin candies, ghost marshmallow Peeps, black decorator icing, Halloween sprinkles
How to Make Halloween Dirt Cups – Step by Step
Step 1: Make the pudding
In a large bowl, add the pudding mix and 4 cups of milk. Beat with a whisk for 2-3 minutes and then let it stand for 5 minutes. Fold in the whipped topping.
Step 2: Add chocolate syrup
Add ½ cup of the chocolate syrup to the pudding mixture. Stir a few times until it is streaky. Cover and chill in the fridge until ready to assemble.
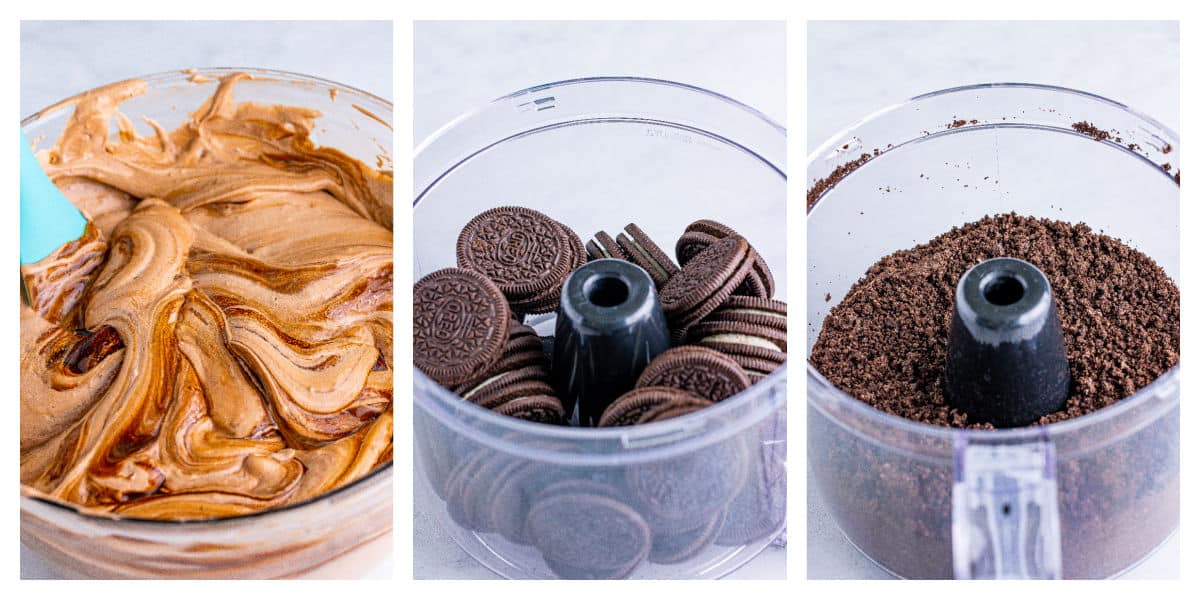
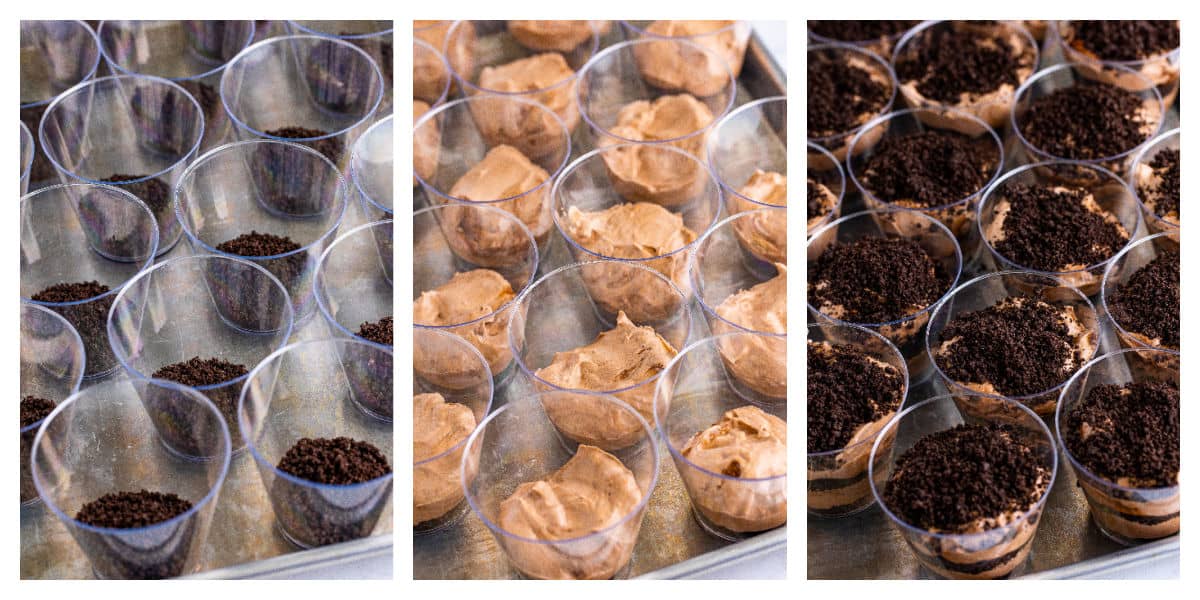
Step 3: Make Oreo “dirt”
Add the Oreo cookies to a food processor or blender. Blend the cookies until they are reduced to a dirt-like consistency. You will need to do this step in batches. Place the crumbs into a large bowl.
Step 4: Make the layers
In your dessert cups (about 9 ounces in size), add a small layer of the Oreo cookie dirt (about 2 tablespoons). Next, add a layer of the pudding (about 1/4 cup.) Follow that with the Oreo cookie dirt again and another layer of pudding. Finally, add 1 Tablespoon of the Oreo cookie dirt on top.
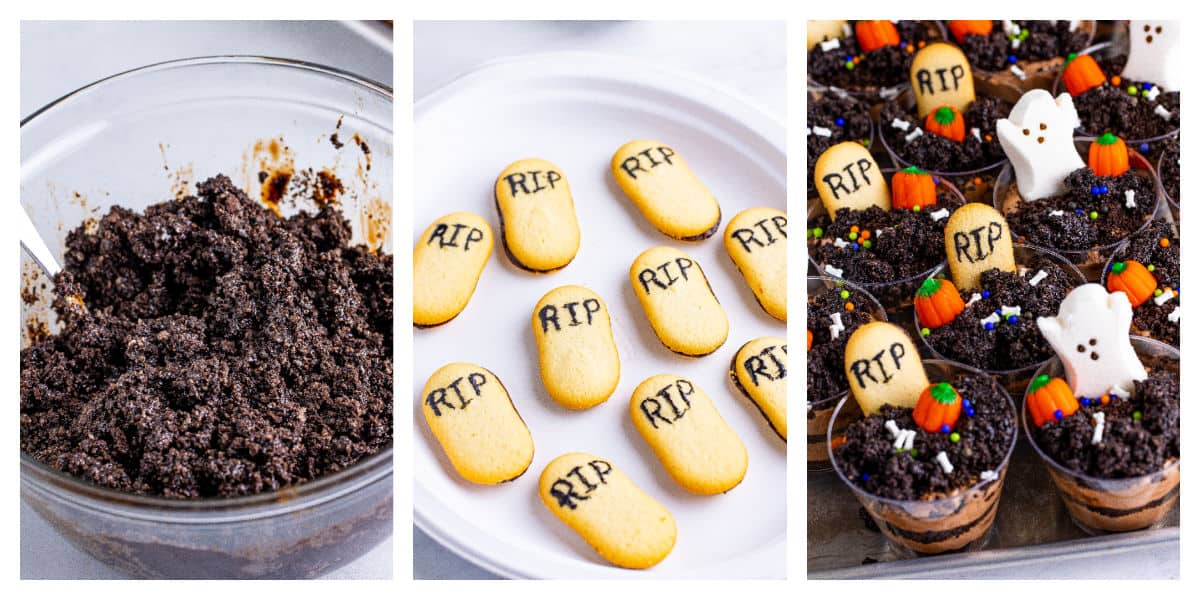
Step 5: Make top layer
Add the remaining ½ cup of chocolate syrup to the remaining cookie crumbs and stir together. This will be clumpy and moist looking. Set aside.
Step 6: Decorate
Decorate the Milano cookies with black icing to say “RIP” and add them to some of your Halloween Dirt Cups. Add peep ghosts to some of the cups.
Step 7: Finish and serve
Take the clumpy cookie crumbs and add this to the tops of the cups to resemble freshly dug graves! Add the mini pumpkin candies and Halloween sprinkles. Serve immediately or refrigerate until it is time to serve.
Halloween Dirt Cups – Tips and Notes
- What size cups to use: I used disposable, plastic 9 ounce cups. You can also use small mason jars or other similarly sized cups.
- Prepare up to 1 day in advance. You can make these Halloween dirt cups up to one day in advance and store in the refrigerator. I don’t recommend making them any sooner than that as the Oreo layers can soften up too much and get soggy. Also, don’t add the cookie or candy toppings until right before you are ready to serve for this same reason.
- Storing leftovers. Any leftover Halloween Dirt Cups can be stored in the fridge covered with plastic wrap. As I mentioned, the Oreo layers will soften over time. You can always add a fresh layer of crushed Oreos to the top when ready to serve again, though.
If you try this recipe, please leave a comment and rating below. I love to hear from you and always appreciate your feedback!
Recipe: Halloween Dirt Cups
Ingredients
- 2 (19 ounce) family size packages of Oreos
- 4 cups milk
- 2 (3 ounce) packages instant chocolate pudding mix
- 16 ounces frozen whipped topping, thawed
- 1 cup chocolate syrup, divided
- Milano cookies, black decorator icing, ghost Peeps, pumpkin candies, Halloween sprinkles, for decorating
Instructions
- In a large bowl, add the pudding mix and 4 cups of milk. Beat with a whisk for 2-3 minutes and then let it stand for 5 minutes. Fold in the whipped topping.
- Add ½ cup of the chocolate syrup to the pudding mixture. Stir a few times until it is streaky. Cover and chill in the fridge until ready to assemble.
- Add the Oreo cookies to a food processor or blender. Blend the cookies until they are reduced to a dirt-like consistency. You will need to do this step in batches. Place the crumbs into a large bowl.
- In your dessert cups (about 9 ounces in size), add a small layer of the Oreo cookie dirt (about 2 tablespoons). Next, add a layer of the pudding (about 1/4 cup.) Follow that with the Oreo cookie dirt again and another layer of pudding. Finally, add 1 Tablespoon of the Oreo cookie dirt on top.
- Add the remaining ½ cup of chocolate syrup to the remaining cookie crumbs and stir together. This will be clumpy and moist looking. Set aside.
- Decorate the Milano cookies with black icing to say “RIP" and add them to some of the cups. Add peep ghosts to some of the cups.
- Take the clumpy cookie crumbs and add this to the tops of the cups to resemble freshly dug graves! Add the mini pumpkin candies and Halloween sprinkles. Serve immediately or refrigerate until it is time to serve.
Notes
- What size cups to use: I used disposable, plastic 9 ounce cups. You can also use small mason jars or other similarly sized cups.
- Prepare up to 1 day in advance. You can make these dirt cups up to one day in advance and store in the refrigerator. I don’t recommend making them any sooner than that as the Oreo layers can soften up too much and get soggy. Also, don’t add the cookie or candy toppings until right before you are ready to serve for this same reason.
- Storing leftovers. Any leftover Halloween Dirt Cake Cups can be stored in the fridge covered with plastic wrap. As I mentioned, the Oreo layers will soften over time. You can always add a fresh layer of crushed Oreos to the top when ready to serve again, though.


Made these last year for Halloween, and forgot to comment, but they were great and we’ll be making them today for this years spooky night! 🙂
The layers created such a fun visual effect. These were so fun for the kids to make!
These are super cute! We’re having a Halloween party this weekend, and I’m putting them on the table!
These Halloween dirt cups are going on my to-make list for Halloween parties. So much fun for kids and adults.
These are so cute and definitely not too hard to make
Dirt cups were my favorite as a kid. I would love to make these for my kids and their friends. They turned out so cute!